3 Steps Leaders Use to Teach Ethics

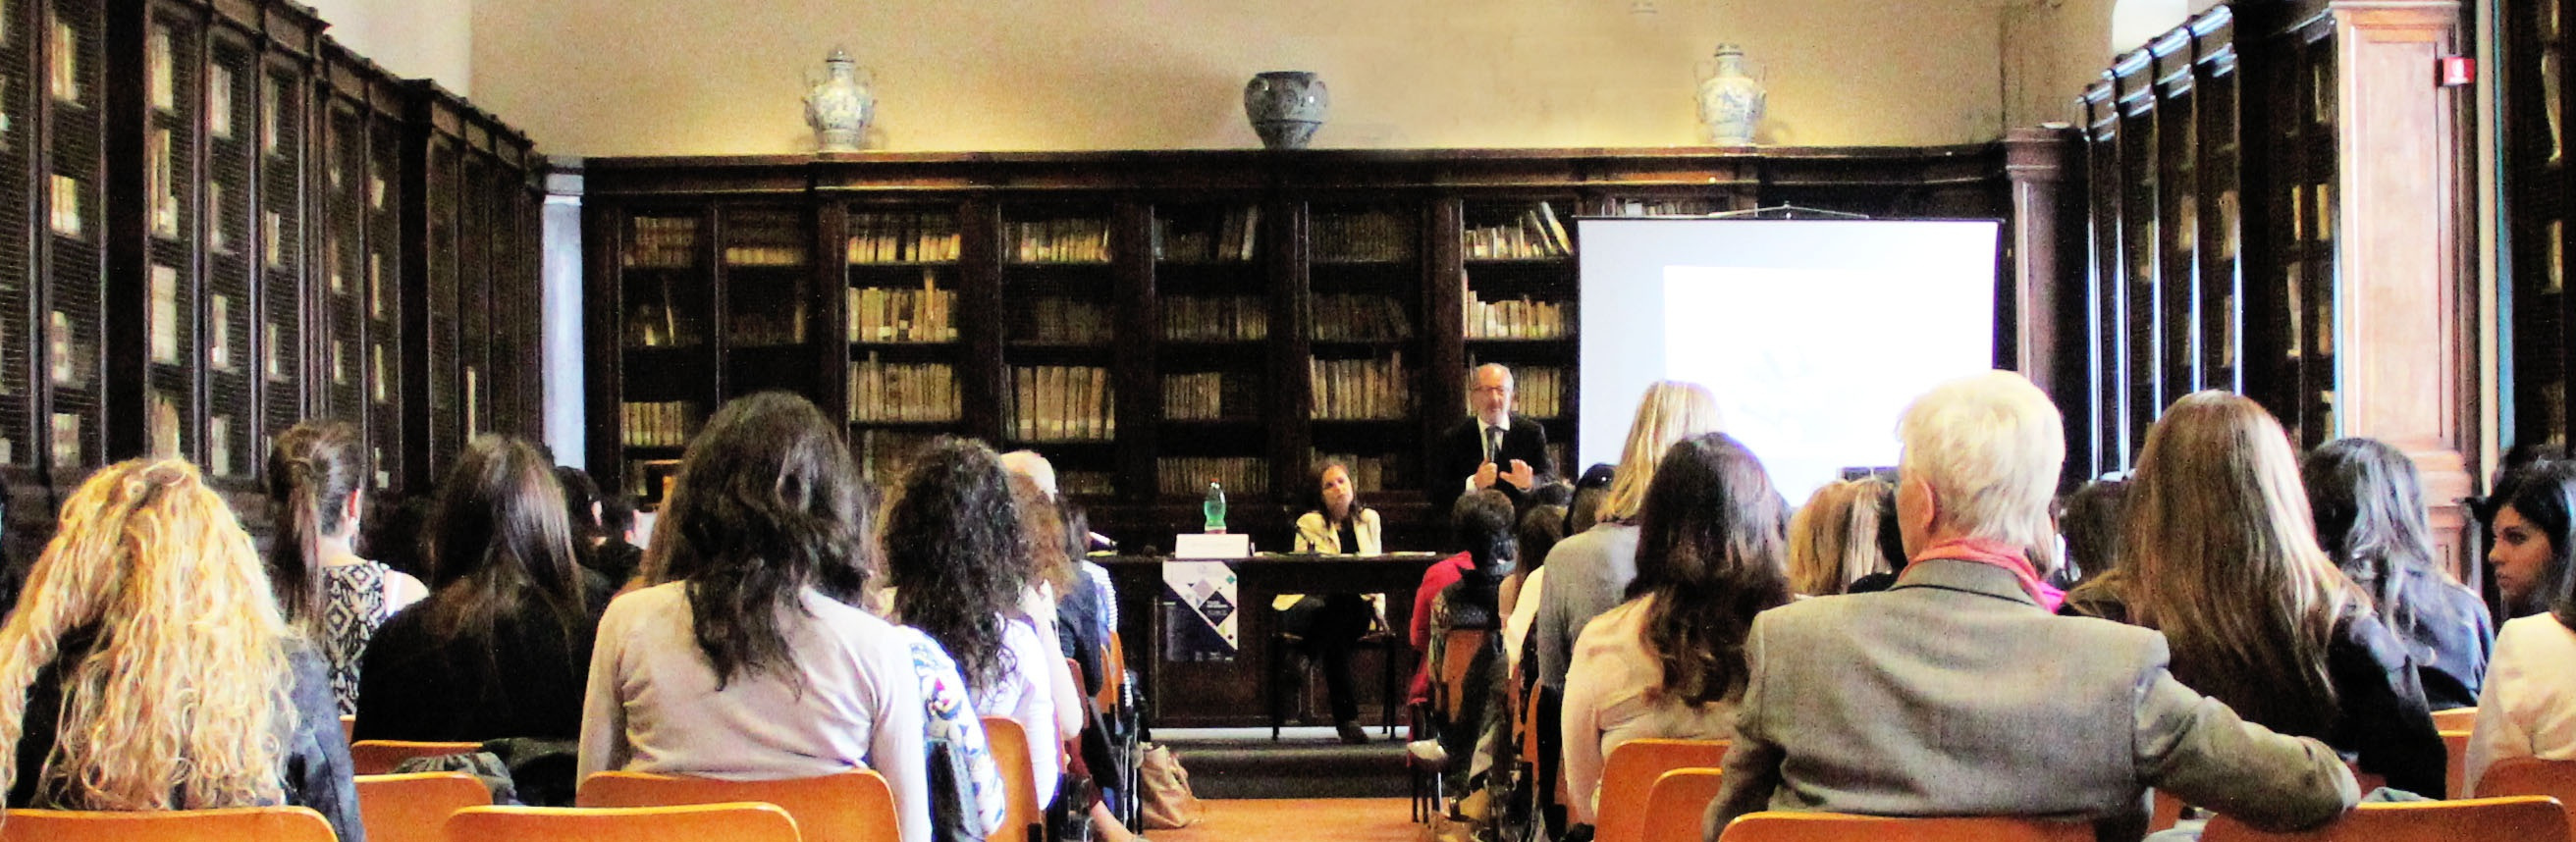
We have all been there. In that dreaded conference or classroom for the mandatory training on ethics. People drag themselves in at the last moment with a look of boredom before the instructor has even shown the first slide. We all know what is coming, the boring text based slides, the monotone speech, the guy in the back row who, while leaning back in his chair falls asleep and falls over bringing a few minutes of excitement and humor.

Photo by Luis Quintero on Pexels.com

Ethics training is important. The only way people in the organization understand its guiding principals is to received both classroom and hands on training. But the training does not have to be like that described in the first paragraph. In fact, there are so many ways to approach ethics training that it is unethical to have bore people during training. Leaders should be prepared to conduct ethics training on three levels. The first demonstrate by training ethically. The next provide ethical training. Finally identify organizational behaviors that require change and train to change that behavior. This post presents a few ideas about how leaders can accomplish each of these goals without having to speak above the din of snoring in the classroom.

The first step, train ethically seems like a no brainer. Well if this statement was true, few of us would know the dread of sitting through one of those classes. Leaders tasked with providing ethics training have an obligation to use time well. Presenting instruction in such a way that students fall asleep and take away nothing to help them do their jobs better just is not ethical. In fact, it may not seem like much learning happens in classed like that buy employees learn their time is not valued and the organization does not value them as people.

If part of the reason organization train ethics is to avoid civil liability, then this kind of training encourages law suits. You can pull out sign in rosters and lesson plans but if students do not take the lessons with them into their workplaces you failed. Leaders should train employees to do the right things the right way for the right reasons. That is the best insurance against torts. Well trained employees help organization avoid liability. Value is added to employees when they understand how to apply guiding principals in their daily work habits and routines.

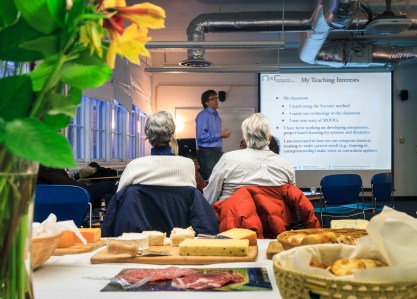
Good training is valued by employees. When employees know they will receive important lessons taught in an interesting way, they look forward to training. Everyone despises the torture known as Death by PowerPoint. The point of presentation software is to help make critical points powerfully. By showing everything you are going to say on the slide the importance of the points are lost. Be prepared to speak the ideas, not the slides.

Helpful supervisors have greater influence by living organizational values – Photo by Startup Stock Photos from Pexels

Now you have demonstrated the ethics of the organization by valuing the time of people and keeping the engaged. That is great but content is still important, teaching ethics. Teach organizational standards, orders, policies or other written documentation governing behavior in your organization. Teaching does not mean reading. Have war stories to share related to when things both went well and when they did not. Such stories show why certain rules and expected behaviors were established. If the training requires students read organizational documents, assign them to read the documents before class. Formulate a series of questions that invites the employees to discuss how those rules apply. Good questions lead to the students sharing their own stories for others to evaluate. As students share their examples others can chime in about the nature of acceptable and unacceptable behaviors. Facilitated classes are great opportunities to share ethical theory with students and show how their biases effect their reflection of organizational standards.

If the point of training is to change behavior then leaders need to include some exercises employees can execute to learn those new behaviors. Repetition is required for this training to be successful, but do not teach the exact same class to the exact same audience time after time. Both you and your students will become bored quickly. The point of this training is to focus student attention to voluntarily comply with the organizational mission, principals, expectations and norms. Use this time to explain what the mission statement means to their section. Talk about how the organizational principals support the mission. Express your vision for the future of the organization. Even if you are teaching the newest, lowest level employee remember that as some point that person may be selected to lead. Share your vantage point with others so they understand the why doing the right things the right way is important to them as well as the organization.

Photo by Andrea Piacquadio on Pexels.com

As you work through the exercises and activities, employees will become aware of how the behavior of good leaders in the organization aligns with it guiding principals. As a leader people are always watching you. When you are doing the right things the right way for the right reasons employees notice. Every time you engage in desired behavior you are teaching others what is acceptable. The boss that uses the sea gull technique of leading will be shunned as they take about guiding principals.

You never heard of a sea gull boss? He or she is the one that is always hovering around above everyone else waiting for someone to make a mistake. When they see the mistake they swoop in, make lots of noise and then fly away pooping on people as they stream skyward.

On the other hand, the boss that is always around but not into everything also notices when employees make mistakes. He or she may watch the employee struggle a bit to see if she can figure out how to fix the mistake. Just before the employee does something harmful, this boss calmly arrives and coaches her through the process.

One of these two bosses will be listened to in ethics class. The other will be ignored. The one that act respectful receives respect. Employees in ethics class taught by that person begin to understand that the positive behaviors are aligned with the organization’s guiding principals and they try to change their behavior accordingly. They have a positive model to follow.

As you develop training for each of these areas, you will soon find you have far more material to cover than the time available. Newer leaders assigned to train will curse and try to squeeze everything into the allotted time. Experienced trainers recognize the opportunity to provide follow up training without repeating previous classes. This provides those leaders opportunities to improve attention and retention in subsequent classes. Focus on the three areas, ethically train, train ethics and change behavior. When you do, your followers will clamor for more.

Leading by Training Others

    Leaders, by their position, are trainers. This important task is often overlooked by leaders particularly in larger organizations with training divisions. However, leaders are always responsible for their followers work and on-the-job behaviors, so they better be prepared to train them.  

Even when leaders are not training others, they are. Everything leaders do sets an example for others to follow. People begin to understand what behaviors result in recognition. Your behaviors demonstrate what behaviors are recognized. Photo by Nappy from pexels.com CC attribution.

    The purpose of training to create or change behaviors by influencing people work or behave in ways acceptable to the organization. One of the most basic training events is new employee orientation.  Orientation sets the stage for employees to conduct their activities in accordance with the organization’s documented procedures. In many organizations someone from human resources conducts new employee orientation. While this process serves to ensure all new people understand the company’s culture and expectations, only the leaders in each office, branch, or division can provide those employees with the expectations in their part of the organization. The best definitions of leadership include descriptions of influencing others, providing motivation, sharing a vision or improving the organization. Leaders who take time to train people do all these things.

    Frequently organizations introduce change by providing some sort of training program. The training describes the desired change. The goal is for employees to understand the new philosophy and provide the skills required to complete new processes. Frequently formal leaders are called upon to conduct the training but not always. How the trainer presents the material either improves acceptance and success or results in rejection of ideas by employees. Training presented passionately increases success and the trainer’s profile with senior leaders.

    Some organizations select high performing workers to receive training about changes then train the rest of the organization. Selection as an instructor gives line workers an appreciation for the vision of the organization’s top leaders. Using lower level employees as trainers has additional benefits. Those employees become in-house subject matter experts in the theory and process behind the change. They learn how to present ideas to influence others to change behaviors. They provide an opportunity for an organization to see how potential future leaders perform when given leadership tasks. The other employees view the trainers as leaders.

   Selecting peer trainers is an important task. Employees selected to become trainers take a few steps up the company ladder. This new position improves their view of the internal workings. Employees who learn to successfully influence others in a positive fashion demonstrate they are ready to become leaders. Their actions help implement the change senior leaders seek to implement. 

     Trainers learn more about the organizational culture. They help senior leaders determine if those employees’ knowledge, skills, and abilities align with future leadership position requirements. Smart employees seek ways to open doors like opportunities to teach and train to prepare for greater leadership roles. Employees may be unaware their desire to teach marks them as future leaders. Many managers overlook training ability when leadership positions become available. Do not overlook them.

     Not all organizations rely on in-house assets to provide training and implement change.  Many look outside and hire consultants. There are times consultants and outside trainers are necessary such as when fielding a new piece of equipment or implementing a new leadership program in a growing company without a training office. If you find it necessary to look outside for training, remember those consultants become leaders in your organization. Check their backgrounds before letting them have access to your vital human resources. Make sure they have a track record of doing what they say they do. It amazes me how many organizations hire outsiders to teach leadership. The consultant comes in for a short period of time, presents the material, then leaves and may never be heard from again. This type of training rarely is effective.

Anyone who teaches is a leader. The instructor may be an established organizational leader, an expert with no leadership title in the organization, or an outside consultant. Regardless, trainers influence others to change their behaviors so they are by default leaders. Photo by rawpixel.com from pxhere.com

    If you hire outsiders to teach your people a skill or ability, insist on periodic return visits to reinforce the lessons learned. This is important even if the training is for some sort of new technology or process. When the consultant periodically returns, it provides your people with the chance to improve their skills. If you hired the consultant because they are a real expert, you people receive more and change more with each exposure to that person.

     This principal also applies to trainings you select your people to attend outside the company. A school or consultant should offer some sort of follow up for their training. This enables your employees to reconnect when they run into some sort of problem. Several training models require students to attend training a few days each month and then return to their work place. They return to the school periodically to discuss how what they learned in earlier lessons worked out in the real world. The experts guide and mentor students to be more effective.

     Examples of such training programs include any of the apprentice programs in the building trades. Apprentices work for a master for months and years. The master teaches the apprentice a new skill then allows the student to practice. The master looks over the shoulder of the apprentice making corrections as necessary. As the apprentice improves, the master spends less time checking the work. When the student masters that task, the master teaches a new skill.

     The New England Association of Chiefs of Police offers a series of trainings for police leaders. In this model, students attend a week of training and learn several important leadership lessons. They return to their home agencies and apply what they learned over the course of a few weeks. Students check in with their teachers and each other to learn how to make corrections and improve their skills as they actually apply them to real world problems. The students return to the school after a few months to report successes and learn a new round of skills.  The periodic interaction with experts and application to real world problems allow those student leaders to become expert leaders much the same as the building trades apprentices.

Never stop learning. After three decades of leading others the author is seen here attending a year long training program for children advocacy center leaders. The lessons learned here will be transferred to others using the techniques and methods shared throughout this blog.

   Leaders influence organizational culture and behavior by training. Learning to train others provides junior employees opportunities to show their leaders they possess skills to influence others. They learn to communicate important ideas and concepts. By creating quality training programs, trainers help management introduce organizational changes. Standing in front of the crowd provides the trainer a spotlight to demonstrate their ability to their leaders and for leaders to influence others. As a leader you are a trainer in your organization. Change a life; change your organization; take time to train others and become a leader.

3 Ways to Use Spaced Repetition in Training

In first grade, we learned the Pilgrims landed at Plymouth Rock. Spaced repetition in school allowed us to learn where they came from, why they came, and that they really landed on Cape Cod first

Albert Einstein said, “Education is what remains after one has forgotten what one has learned in school.” It is all those things you know, but you could not tell someone how or why you know it. If you think back to your school days and the lessons you learned you would find out that you did not learn as much as you think. You learned the same things over again in different grades. For example you learned about the Mayflower and Paul Revere’s ride in First Grade. When you in perhaps Fourth Grade, you spend another year learning American History but instead of the fairy tale version, you identified and learned what caused the pilgrims and patriots to act. When you studied American History again in middle school, you identified the consequences of the actions of key events and figures in history. In high school, you were asked to think critically about how history could have been different if historical people made different choices. Your learning about American History was spaced over time. Each time you added to what you previously learned. As an adult instructor or leader, find ways to introduce spaced repetition into your training. As a trainer you can build on earlier lessons whether the training event is a few hours or a few weeks.

As a trainer you have a responsibility to develop lessons that build on each other to reinforce earlier lessons and help students understand why skills and information taught earlier are important. Using spaced repetition is easier when your lessons occur over days or weeks. Spacing important learning points in a lesson that lasts only hours is more difficult but not impossible. Start by knowing the learning goals of your lesson. Here is a link to preparing learning goals: https://saintcyrtraining.com/2013/08/27/inspire-others-to-go-forth-and-do-good/.

After you identified the important learning goal of your lesson, you know what points to target for spaced repetition. Arrange your lessons so each learning goal is a logical building block. As you complete lessons for each learning goal, do a quick review to show how learning goals build on each other. Each review serves as a spaced repetition of early lessons.

Practical exercises allow students to use skills, ideas, and information learned earlier in the training to make connections and employ spaced repetition.

Another method to employ spaced repetition is to develop practical exercises that require students to use skills learned earlier. For example if you are teaching a group of students to navigate in the woods you would teach them how to read a map, how to use a compass, how to calculate ground distance, and how to calculate the difference between the magnetic and map north readings. After teaching the lesson on distance, you give the students an azimuth and direct them to move along that azimuth for a certain distance. This activity requires them to use the compass and practice the skill of determining distance while moving along the ground. In the final exercise you give them two points on a map to go and find on the ground. This exercise requires your students to read a map, use a compass, calculate the difference in north readings, and measure distance on a map and on the ground. Each exercise builds on earlier lessons and gives an additional repetition space over the course of the training event for each learning goal.

Training events occurring over a longer period of time allow instructors to create more space before each repetition improving retention. Begin each new session with a brief review of prior learning. Ask students to share how they applied what they learned in their lives. Ask for them to report on the results achieved. At the end of the session, ask the students questions to make connections with past lessons. Ask how implementing today’s lessons will improve results by adding the skills learned today to the skills they learned before.

Using spaced repetition during training sheds light on lessons.

Repeating information throughout a training event allows students to make connections to each learning goal. Students understand how each learning goal related to the others. Students improve their understanding of the overall main idea by making connections between learning goals. Spacing the repetition of the basic building blocks of the main idea reinforce those foundational lessons improving retention. Developing various exercises to support each learning goal allows the student to see, feel, hear, and understand the skill in practice by doing it. Spaced repetition is a great way to improve your students’ skills when they return to their world. They know, understand, and do what they were taught which is the objective of every training; changing behavior. Add spaced repetition to your training and watch the light bulbs illuminate in your students.

Photo Credits

  • 1620 by Robin Booker from pixabay.com using pixabay license
  • Map and compass by Hendrik Morkel from unsplash.com using unsplash license
  • Lightbulb by Fachy Marin from unsplash.com using unsplash license

Use the comment bubble at the top of the page to discuss this content.

Breaking the Ice: Classroom Introductions

Coast Guard Icebreaker Healy breaking lake ice.
USCG Icebreaker Healy

Whether you are teaching adults a college course lasting several weeks, workers about a new process in a half-day training, or conducting on off-site seminar lasting a few days, breaking the ice establishing norms, and identifying expectations is a critical first step. Setting the stage is an often overlooked learning activity by inexperienced trainers. New trainers believe the time available to puke out their information is too valuable to waste getting to know each other, what comes next in class, or how student performance will be evaluated. However, adults learn better when they know something about the others in class, understand class expectations, and know how their learning will be evaluated. Using these suggested activities will help you create a climate to prepare your adult students to learn at their best. Tailor introductory activities to meet your time frames.

Introductions

Introductions are important. It is easy to stand at the front of the class and brag about your background, then go around the room asking each student to share their name and something about themselves. That really does little to help students connect to each other. There are dozens of ice breaker ideas. Here are two.

Ask students to break out into groups of three to six. Have them select a recorder. Each student reports one thing that makes them unique, what they do in their current work position, any special resources they bring to the class, and a question or concern they have about the class (i). Give the groups 15 to 20 minutes to work on the exercise and then report back to the class. This activity allows a small group to meet with others, and the whole class to develop an understanding about the class members as a whole.

Group of people putting their hands in the center of the group.
Student introduction exercises are more effective when students actually talk to each other.

A second introduction activity is a mixer. During this activity, students form two lines facing each other. For two minutes the pairs discuss whatever they want. At the end of the two minutes, everyone moves to their right or left, those on the end spin around facing the opposite direction. Repeat as many times as desired (ii). This activity allows each student to meet several students and know something about the others.

Setting Expectations

Stephen Covey talks about seeking first to understand. You can do this in your class by finding out what your students expect during class. Ask the class what they expect to take from the class. You may choose to record these expectations on a flip chart or whiteboard. Completing this exercise allows you to understand what students think about the topic of the class. You may find that some of their expectations are not in line with your learning objectives. This provides you an opportunity to adjust your training to meet student expectations, or explain why the training is not set up to meet those expectations.

Now that you understand their expectations, you share yours. Your list may include expectations about breaks, class participation, note taking, or any other expectation you want to share. This activity allows students to understand how best to interact with each other, the material, and you during the training or educational event.

Tell Students about the Class

In this part of the introduction, tell the students how you conduct your class. Letting students know you ask lots of questions helps them prepare answers. Likewise if they know you are going to present some material, ask some checks on learning questions, and follow up with a group activity for each learning step, they can mentally prepare and know what comes next. Tell them if you are planning on doing individual worksheets, small group exercises, videos, and what to expect in the way of slide decks.

Introduce your learning goals. Depending on the course of instruction, you may have one or several terminal learning goals. Each terminal learning goal may be supported by one or more enabling learning goals. Develop one or more task steps or learning activities to support each enabling learning goal. During the initial introduction, provide only the terminal and enabling learning goals. Introduce the supporting task steps and learning activities at the being of the block of instruction for that learning goal.

A group of students sitting around a computer working on a group learning exercise.
Students need a variety of activities to remain engaged. Telling them what learning activities happen in class prepares them to participate well.

Tell students how they will be evaluated. No one likes a pop test at the end of training. Let them know if there will be a test. Will it be a written, hands-on, or a little of both. If written, how is the test constructed; short answer, multiple choice, fill in the blank, etc. Adult students need to know how they will be evaluated so they can participate in ways that maximize their individual learning styles.

Tell Them about You

Before you talk about yourself, talk about the facility. Where are the bathrooms and emergency exits? Are there any safety issues they need to know? What is they wifi password? These are simple things that reduce stress.

Now introduce yourself. Bragging turns off people. Tell a story that is relevant to what students will be learning. Tell students why your story is important to help them learn. Share why you made choices you made, and how those choices affected your learning. Be modest. Let students know you made a mistake or two on your journey. Your mistakes communicate you are still learning and it is okay for them to make mistakes in class. The whole point of your introduction is to establish, in a personable way, why students should listen to what you say.

Explain your teaching and leadership style. Let them know if you prefer to be contacted at a certain time of the day. Provide contact information so they can reach you with questions after class.

A quality introduction sets the stage and establishes the climate for your training or educational event. Students develop a better understanding of others in the class with brief introductions establishing trust. They know your expectations, those of other students, and have an opportunity to share their expectations with you. Introducing learning objectives ensures students understand the topics they will learn. Discussing how learning will be evaluated allows students to prepare for the evaluation. Letting students know something about you establishes reasons they should trust you as a teacher and instructor. Tailoring introduction activities to the time allowed for the training ensures students are prepared to learn. This learning step is easy to skip, but reduces the effectiveness of training. Experienced professionals use introductions to create a positive learning environment for their students.

————- Photo Credits ————–

By U.S. Coast Guard/DoD – DoDMedia, Public Domain, https://commons.wikimedia.org/w/index.php?curid=2338112

All hands in by rawpixel.com from Pexels

Huddled around computer by Fox from Pexels

———- References ———-

iKnowles, Malcolm S. Designs for adult learning. (2009) American Society for Training and Development. Alexandia , VA.

iiPeterson, Deb. Adult ice breaker games for classrooms, meetings, and conferences. (2018). ThoughtCo. Retreived from https://www.thoughtco.com/c lassroom-ice-breaker-31410 1/20/19.

Note-Taking Guides in Training

Man_taking_notes-PXHere

Taking notes during class is a tried and true method to improve information retention. Developing a note-taking guide or workbook is a great way to encourage your students to take notes during class. A good note-taking guide is more than the traditional presentation handout with three slides on each page and lines in the right column. A good note-taking guide requires active participation by students to record and receive all the information. It takes time to develop a good guide. It begins as you plan your lesson. Here are some tips and ideas to make a great note-taking guide for your students in leader training.

Using your slide deck is a great place to start. You can simply replace key text with underscores to create blank spaces for students to complete. If you select the two slide per page option, the slide is large enough for the student to write their answers. If you develop great slides, the kind with pictures and little text, using the fill-in-the-blank method will not work. A little creativity, however, allows you to incorporate pictures into your note-taking guide and still provide a space for the student to insert keywords for retention. The SMART Goals page is an example of using this idea. Using pictures in your workbooks reinforces the ideas from your slideshow. You need to creatively find ways so students will insert the keywords to help them remember the meaning of the picture.

There are times when text is necessary such as introducing laws, rules, definitions, or quotes. Replacing keywords from the text with blank spaces is a great way to ensure students record the key ideas from messages requiring lots of text. Often, students who do take notes in a traditional notebook try to copy every word of every slide. When they take notes this way, they miss the supporting information spoken by the instructor. The blank space replacement method permits enough writing to reinforce important messages from the slide, and also allows the student to listen to the explanatory message from the teacher. Providing some additional space allows the student to record connections they make from the information to their experiences.

Fill In The Blanks.jpg

Copy the high points of your lesson outline into a separate word processing document. Using this method provides the same information as slides, but allow you to reduce the information in the workbook. It also is a great way to provide a note-taking guide if your slides do have lots of pictures instead of text. Go back and delete important points and replace them with the blank line. The blank lines send a message to students that the missing information is important. Having the high points puts students on notices about the general direction of the training. They know when important information is coming and are understand what the main ideas are versus the supporting ideas. Another method is to provide the category of information and then place an empty numbered list below the heading.

Training classes should have learning activities sprinkled throughout allowing students to practice what they learned. Use individual, collective, and small group activities during leaders training. The note-taking guide is the perfect place to insert worksheets, instructions for exercises, or a place to record reflections of the learning activity. Frequently individual worksheets become separated from students notes. When they return to the notes later in their lives, they lose the benefit of the lessons learned during the classroom exercises using worksheets. If those learning steps are part of the class workbook, they are available to students days or years later when they reflect on finer points of the training that they want to remember at that later time.

As you prepare the note-taking guide, you will find it tempting to include everything from every slide in your presentation. Do not do it. I took a two-day class some time back. The students were provided with copies of the slides later. There were over 300. I have a two day class on professional decision making I teach. There are less than 80 slides. The note-taking guide allows students to note the most important learning points from your lesson. No one is going to easily find the information they are looking for by reviewing 300 slides. When I attend a training, I try to limit my class notes to one or two typed pages per hour of class time. With that number in mind, you should aim to only have one or two workbook pages for students for every hour of class. This number does not include any worksheet activities. If the class I took with 300 slides had information from each slide in the note-taking guide, the document would probably be 150 pages. Notes should be a summary of what is learned in class. A 150-page notebook is not a summary.

goal setting cycle.jpg

Flow charts showing processes and decision points are great for inclusion in note-taking guides. The page includes all of the steps and decision points but excludes text. Include text for the most critical points so students have that information after class. Leaving most of the steps empty however requires the students to pay attention and fill in the blanks. When they leave class, they have a model of the whole process. The remember more of the process because they wrote it down in the note-taking guide. They can return to it anytime and review the process improving the quality of their work without supervision in the future. Their behaviors conform to the organization’s expectations which is the point of conducting training.

Developing a note-taking guide for leaders training is a way instructors encourage students to take notes during class. A well designed note-taking guide serves as a workbook by including adequate space for structure and unstructured note-taking, forecasts what points will be made during the training, includes worksheets for use during learning activities, provides pictures with meaning, process charts for student completion, and improves lesson retention. Students structured notes to refer to in the future to share their learning with others, and to refresh their learning. An ideal note-taking workbook is one or two pages for every hour of training exclusive of any learning activity worksheets. The guide is not a copy of the slide deck used in the presentation, rather it complements the slide deck. A well designed note-taking guide improves learning but takes time to develop. Development begins as you work on your lesson plans. Your students will leave class thinking you are the profession expert you professed to be when you provide a quality note-taking guide.


Image Credits

Person Taking Notes:  PXHere.com-no attribution information.

Workbook page examples: Author from examples of his note-taking guides.

The RSA language is from NH.gov.

Charting Your Course on a Flip Chart

Low-Tech, Message-Rich, Flip Chart

nextSlide decks are high tech training tools when used properly help improve information transfer by embedding several types of media as well as text. Too often, they become little more that a high tech chalk board. You remember chalk boards, those black things teachers wrote text on they wanted students to remember. If a teacher took time to write something on the chalk board you know it was likely to show up on the next test. Most slide decks fail to emphasize what is really important. With so much text, there are no powerful points in text based presentations. Like a chalk board, an easel with chart paper is a low tech teaching tool that is portable. writing-workshop-pink-paper-label-brand-1340802-pxhere.comYes you can write words on chart paper which may serve as a tool to share important points. You can also use chart paper to record students thoughts and ideas during a class discussion. You can pull out those ideas later in the class to reinforce important learning points. When well planned, a good trainer draws a picture as s/he speaks, really draws on the pad a picture. Students are amazed at the trainer’s ability to draw while speaking. Using chart paper effectively in training takes planning, preparation, and practice.

As you work your lesson plan, think about different ways you plan to present material. Slide decks have become the go-to media because trainers sit at their computers and spill ideas related to the information in an outline that becomes their slide deck. Full of text, those presentations could almost serve as a text book read by students negating the need for your class. There are lots of ways You can find ways to improve your slide decks. Look for articles else where on my site, but if you want students to remember what you teach, you need to begin to master more than presentation software applications.

Creating the outline of the points you want to make during a training event is still a great place to start. You use the outline to identifying your learning goals. You do not need to present every learning point to students on a slide deck. Now that you have your lesson outline, you can figure out various learning activities to teach those points. A slide deck is on way. Other learning activities include student discussion, cooperative learning exercises, media presentations, and lectures. Instructors who use only slide decks limit their ability to transfer knowledge to students. Flip charts are a versatile method to improve transfer and retention.

Cambodia4kids.org Beth Kanter-flipcharts2-flikrUsing a facilitated discussion allows students to share what they already know. This knowledge may not be known to everyone in class. This method involves the student. Student involvement increases information retention. If this information is foundational to later points in your lesson and you intend to refer back to it, chart paper is the perfect method of capturing and presenting these points.

Many of us know, “a picture is worth 1000 words,” yet still use thousands of words on hundreds of slides to communicate ideas in training. While it seems chart paper was born for text, with a little planning, preparation, and practice, you too can become a chart paper artist. There are two secrets to drawing on chart paper in front of an audience. The first is to plan how to use each page of chart paper during your presentation. For example, on page one you will record things students expect to learn in your course, page two is a list of responses from the class to a discussion question, and the third is a picture you selected to show achievement. You must know which page in the chart paper is going to contain your pictures in order to apply the second secret. Many instructors place notes on each page of their flip chart to keep them on topic rather than using a regular lesson outline.

The second secret to becoming a well known chart paper artist is sketching your drawing with light pencil lines on the selected page before you present. There are two ways you can accomplish this successfully. The first and easiest is to use a projector and trace the important lines lightly with a pencil. The next is the classical grid method. Print an image and impose a grid system over it. Recreate Me-Draw_Vase.JPGthe grid on your chart paper. Copy the lines from the small print to the large paper lightly with pencil until you have the image you want. In both cases, you can see the lines well enough to recreate the image as you present your message verbally. Your students will not see the lines.

I built on this gem during an instructor development class. During my presentation on using chart paper I asked a student to draw the picture I described. I asked the student in the break before this section to help and share the secret with him. The class was pretty impressed with how well the recorder was able to capture what I was saying without more instruction from me. About half way through the presentation I asked my recorder to select another student to replace him, but not explain how he created what I wanted on the page. This exercise demonstrated the power of using chart paper in a well thought out presentation for all the future instructors.

A third way to use chart paper is recording student responses to discussion questions. This is a great way to save those ideas for activities later in class. Record their responses as closely as possible to what the student actually said, particularly if you plan to use the responses to counter ‘common’ arguments to a course of action. When the time comes to reuse the page in class, you can return to the flipped pages or hang the page(s) somewhere easily viewed.

You need to know some other things to effectively employ chart paper during presentations. Use high contrast colors such as black, red, blue, brown or green. Print large and neatly, do not use script. Letters should be at least one and a half to three inches high. I found printing in small all caps with the first letter larger helps me print neater. Keep your text straight. Use a pad with preprinted lines, or add pencil lines to pages you intend for text. Alternate the color of each line item. Alternate colors help the students understand which ideas belong together. I like to use black for the title of the page and then red or brown with blue or green in the body. Allow students to do your writing for you. This engages them more. Movement helps keep everyone awake and paying attention, very useful after lunch.

writing-person-professional-lecture-hz10anz-439533-pxhere.com.jpgWriting takes time. Use this time to encourage students to take notes as your write. You know they have time to write down important points if you are writing them at the same time. When creating illustrations or charts, students demonstrate improved understanding of processes. They also participate more because they think and reflect as you draw resulting in a livelier class.1 Student participation improves student retention.

Slide decks are great to standardize messages and presentations. They are also a great way to put audiences to sleep ensuring the message is completely missed. When used well, presenters embed a variety of media, not just text, to keep the attention of their students. Even though chart paper is low tech, it is a media form that keeps student attention. Using chart paper requires the presenter to move away from the podium. Chart paper allows the presenter to make important points by selectively writing down need-to-know information. A blank page allows the presenter to draw a picture saving 1000 words of writing while capturing student attention. Instructors can display information from more than one page to be simultaneously allowing reference to the page throughout the lesson. Student ideas on important discussion points can be preserved for later use in class. The simple pad of chart paper on an easel seems passe, but used well, it remains an important tool in the box of any great presenter. Think of all they ways you can use it in your next presentation.


Reference

1. Dlugan, A. Jan 29, 2013. Six minutes speaking and presentation skills. Flip charts 101: How to use flip charts effectively. Retrieved 9/24/2018 from http://sixminutes.dlugan.com/flip-charts-101/


Photo Credits

Author

pxhere.com 0CC license

Beth Kanter: Cambodia4Kids.com  CC license

Author

pxhere.com 0CC license


Can Do, Building Skills

people-auditorium-meeting-sitting-student-education-1246944-pxhere.com-modified.jpgMany organizations confuse training and education. Training is a process of teaching people skills. Education is a process of transferring ideas or knowledge. Often organizations educate people but call it training. People learn ideas and gain knowledge from education. People learn skills from doing the required task. Education is necessary to build skills. Building a skill is not required to aquire knowledge or learn new ideas. This is were the disconnect between education and training occurs. Trainers think passing ideas and knowledge to learners means learners understand how to use the information to complete tasks. For people who posses skill in a given area, this may be true. More often, new learners need practice completing the skill one task at a time after receiving foundation ideas and knowledge. People learn skills by doing.

beach-sea-coast-ocean-horizon-cloud-83500-pxhere.com-modified.jpgIn the movie, The Karate Kid, Mr. Miyagi teaches Danny several karate defensive moves through the process of household chores. Miyagi never tells Danny why he is expected to complete certain tasks in the prescribed fashion, only to follow instructions. Eventually, Danny learns the basic skills of karate.

Most adult learners require understanding of the ideas behind a skill. Education is required to pass along knowledge and ideas. Typically ideas and information are presented in slide decks lulling learners to sleep. Transferring knowledge requires communication. Sleeping students receive less information that alert students. Showing images related to the task while discussion the action supported by an idea improves knowledge. Require students to take notes during your talk so they can access knowledge during skill building exercise.

Students remember slides with images better than slides with only text. Use an image that has something to do with the information presented. Trainers committed to improved slides often turn to photographs or computer generated drawings. Charts and graphs are also images. Charts and graphs help learners understand how information relates to similar information. Images of flow charts showing steps required to complete a task, or data comparison puts information in perspective.

Follow up each bit of knowledge with a check on student learning. This can be in the form of questions, asking students to discuss their understanding, or a short worksheet. Learning checks ensure students received the knowledge, understand it, and remember it. This step serves as the base for the next step, building skills. If the foundation is defective, the structure eventually fails.

person-smoke-military-portrait-soldier-army-732095-pxhere.comCompleting the educational piece of the training sets up students to work on skills. Whether the skill is making a peanut butter and jelly sandwich, conducting an analysis of data, or building a rocket motor to take a space vehicle to Mars, knowledge is the basis of the skill. Skill building exercises begin the process of changing ideas and beliefs into actions to achieve results.

Skill building exercises can but used as checks on learning as described above after the introduction of certain information, or as separate learning steps after information transfer. In the example of analyzing data, students may need to understand data base basics like data entery, how reports are generated, or how to write a standard query language command. The instructor determines what information students need to know and develops a means to transfer that knowledge. The instructor follows up with some questions. The skill builder requires students to enter certain portions of data from a stake of 3×5 cards. The exercise teaches students how to find data in a source document, how to work the software, and develops understanding of how errors may occur. These exercises reinforce information provided students during the education portion of the training.

Another exercise might require the students to organize the cards manually so they understand the process databases use to organize data. The teacher might ask a group to alphabetize the cards by last name. Another group organizes the cards numerically by phone number. A third group sorts the cards by age of the person. The first two are pretty simple. The last exercise helps them understand how the computer has to calculate the year and then sort by month and then day. That is a more complex task than just alphabetizing, especially of the date fields include month by name rather than by number.

work-person-people-girl-woman-hair-790938-pxhere.com.jpgEvery skill building exercise should be developed to allow students to connect the skill to information learned during the educational portion of the training. Connecting knowledge to skills improves understanding so when things go wrong, students can trouble shoot the situation. Teachers and instructors cannot teach students how to respond to every possible situation they may encounter. Connecting skills to knowledge allows students to effectively solve problems in the real world.

As students work their projects, they will make mistakes. Making mistakes is an important part of skill building. Mistakes in training are opportunities for instructors to provide deeper information, improve understanding, and identify areas where knowledge may not have been transferred effectively. Mistakes allow students to rely on what they learned to correct mistakes on their own. Correcting mistakes allow the student to practice again.

Instructors share information with the class based on student mistakes improving overall understanding. People absorb only so much information in an abstract sense. As they begin to develop skills, mistakes hand-guitar-tool-leg-hammer-nail-704019-pxhere.com.jpgpresent opportunities to provide additional information and improve understanding. Use mistakes as opportunities to expand student knowledge of how a task step effects the overall skill.

Sometimes instructors fail to effectively transfer information to students. The information may have been communicated poorly, or the student may have a barrier preventing reception of the message (like sleeping during your boring slide deck). The instructor should accept responsibility for the lack of transfer and send it again. In the process, the instructor may learn other students failed to receive the information correctly. Restating the information using other terms may improve understanding. Asking a student who demonstrates understanding to explain is another way to help students learn.

Training and education are not the same thing. Education is an important part of training. Education is simply passing knowledge or ideas from one person to another person. Training requires the transfer of skills. Skills are best learned by doing. Training is doing. Instructors identify critical knowledge and tasks required to learn a skill when they develop training. During the educational portion of the training, the instructor passes on knowledge and ideas to students related to the skill. During the doing portion of the training, the instructor develops exercises to build skills one step at a time so students can complete the task upon completion of the training. Students develop skill by doing activities. Training develops skills so people know and can do. Next time you are assigned to conduct training, develop lessons that transfer knowledge and incorporate doing.


Photo Credits

All images from pxhere.com used under a 0CC license.

Show Me, Bring Action to Your Training

music-light-people-crowd-concert-audience-870980-pxhere.com.jpgKen Blanchard spent many years working to improve leadership, training people tactics and habits gleaned from successful leaders. His philosophy is tell them, show them, let them, correct or redirect or praise them, and repeat (Be, Know, Do. Blanchard). In an earlier training article, I discussed whys to improve knowledge transfer in the telling stage using checks on learning. This article focuses on the show them stage. Having more methods to teach people ensures you connect with as many learners in your class as possible. If you only tell them things, visual and kinetic learns are left behind. There are several ways to show people. This article discusses three methods of showing; pictures, videos, and demonstrations.

Slides are a common classroom method of sharing information. Text based slides are telling, not showing. Slides with nice pictures for the sake of having pictures are also telling, not showing. nextPicture based slides showing stances, methods, screen shots, and other action are showing. Pictures may contain text for the purpose of showing finer points. You may want to add an arrow for direction of action, or to show points of attention. The image shows how and what to do saving thousands of spoken and written words.

I discussed finding lots of high quality low and no cost photos and images in an earlier blog. Check out the information at this link: https://christopherstcyr.wordpress.com/2017/10/31/one-thousand-words/. There is generally no requirement to use images as they were taken or created. Using image manipulation software allows you to edit the image to meet your needs. Photoshop is a high end answer. GIMP, short for GNU Image Manipulation Program, is a free, open-source graphics editing program. With such software, you can create the image you wish you had by cropping, tweaking colors, making something black and white, with a single color for emphasis, creating a new background, deleting ugly utility poles, or anything else that make the image tell the story you want to tell. Learning to use graphics editing software seems intimidating, however YouTube has lots of videos showing how to do anything you want to with GIMP and other graphics software.

A great way to show how to do something is with videos. camera-vintage-antique-wheel-retro-old-804975-pxhere.com.jpgIf you create a video, do not simply transfer the classroom lecture to the screen. Use video showing someone doing the skill you are teaching. Sound is not required. You can narrate the action for the class. Consider inserting pauses in the video allowing discussion.

Editing video is not as easy as editing pictures. PC World picked Shotcut as the best free video editing software for 2018. Shotcut offers several tutorial videos. Like GIMP, YouTube offers plenty of additional tutorial videos. As with GIMP, you can use Shotcut to customize an open source or public domain video from the web, or create your own content.

Use caution when using videos from others. Copyright law offers protection for using small amount of video (or any other copy righted material) for educational purposes. If you use a whole video produced for the purpose of education and requires a fee for classroom use you may receive legal process. Copyright laws are intended to protect intellectual property, but they allow fair use. Richard Neil has good information about copyright and fair use on his website: http://www.leotrainer.com/copyright.html.

Videos supplement your lesson. Videos do NOT replace you. You may have videos that show in exacting detail how to rebuild a carburetor, but you are the expert in the room. Impart the little tricks and secrets you know from your years of completing the tasks you train. If you show nothing but videos, your students figure they could watch them from home or their work location online. Anyone can push the play button. Be the expert and add to the information shown in videos you select for your training.

Demonstrations allow students to see a task executed first hand. Whether you are milking a cow, or creating a bench hook, watching someone do it helps learners understand the task better. Ideally the instructor should conduct the demonstration. Sometimes instructors team up; one talks about the task while the other executes. If you select the two person demonstration, coordinate with the other person. You both need to practice the demonstration ensuring the narration matches the action. A firearms instructor trainer I know cautions student instructors to practice drills they plan on teaching their students. If the instructor cannot execute the task accurately and correctly 99.999% of the time, he looses his expert power. Students walk away from the demonstration convinced the instructor is a wind bag because he cannot be execute the task. If you cannot complete the task in a training environment, how are students going to execute the task in the real world? Practice your demonstrations and drills so you appear to be the expert you are.

Repeat your demonstration more than once. Change the way you stand so everyone in the class in able to see what you are doing. Tell the class you will be moving so they can see the finer points of the demonstration from all angles. Repeated demonstrations are especially important in larger classes. Move to a different part of the training area. Use live streaming video for work on small tasks such as setting coupler height on a model railroad car, or showing the angle of a file while sharpening a saw. Unlike the magician Magicianpuking cards-pxhere.jpg
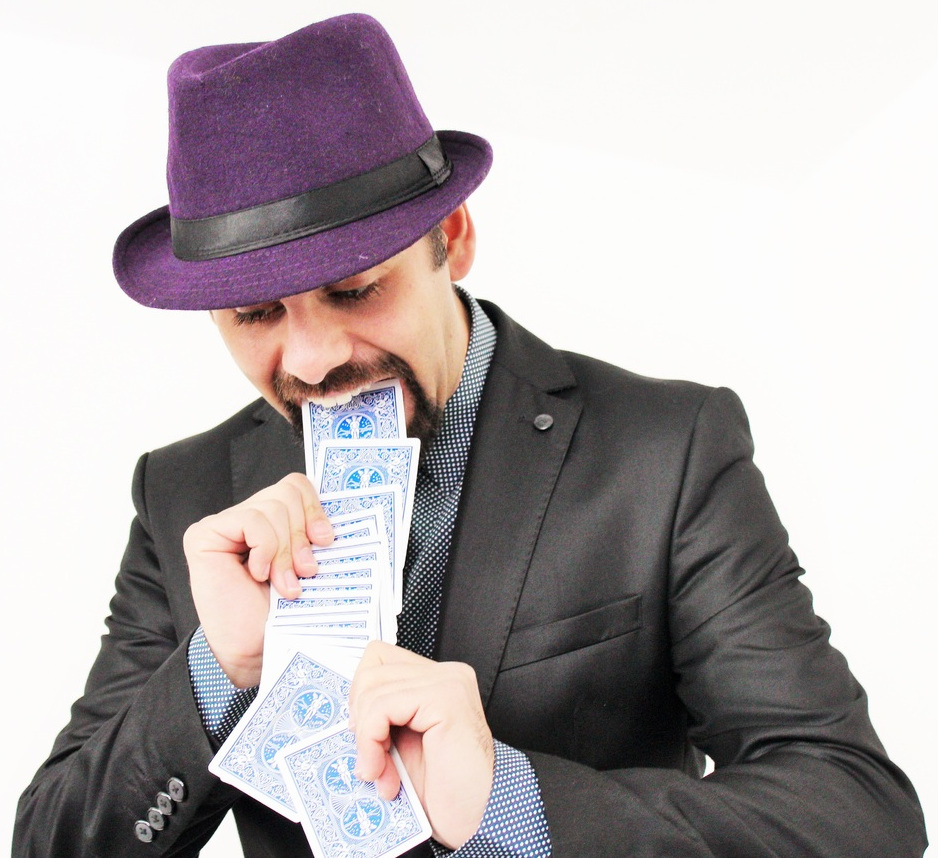
who only shows a trick once to prevent others from learning how he did the trick, your goal is for students to leave your training knowing the tricks and how to perform them. Repetition ensures your students understand and improves their skill.

Showing students how do accomplish a new skill is an important in any high quality training. Showing turns knowledge into action. Three common methods to show others are use of photographs or drawings, showing the skill performed using videos, and live demonstrations by an instructor or skilled assistant. Each has advantages and drawbacks. Pictures are easy to put together. They are static. After a few slides students become bored, however stills may show better as a series of images. Videos provide action. Videos are abundant on the internet but may not show exactly what you want shown. It is more difficult to create original video content than static slides. Demonstrations seem like the perfect solution. They provide action, allow the instructor to narrate and point out fine details, but the demonstrator must be skilled to ensure flawless execution. Some tasks are difficult to demonstrate to a group such as how to land an airplane, or the proper application of explosives to safely collapse a snow drift to avoid an avalanche. Learn to use each method at the right time for the right audience. Showing turns ideas into action and improves retention. It is the second step in teaching new skills. Add a few shows to your next lesson. Your students will walk away smarter.

—————————–

Additional Resources

Ken Blanchard Companies:  https://www.kenblanchard.com/

GIMP Official Website:  https://www.gimp.org/

ShotCut Official Website:  https://shotcut.org/

Use official websites of open source software to avoid potential unwanted software and malware.  Carefully read the installation windows.

  —————————————-

References not incorporated in the article

PCWorld article: https://www.pcworld.com/article/3240982/software/the-best-free-video-editing-software.html

  ————————————–

Photo Credits

Light Show – pxhere.com  CC Zero license

Next Slide — Author

Antique Projector — pxhere.com

Magician — pxhere.com

Check Learning to Verify Knowledge Transfer

“Tell them what you are going to tell them; tell them; then tell them what you told them.” The idea is  something heard three times is more likely to be remembered.auditorium-pxhere There is a better way to make sure your student learn material and for you to know they learned what you taught. Conduct checks on learning during and at the end of your training. Checking learning ensures they heard and retained what you taught. Two simple ways to check learning are simple exercises and questioning.

An exercise that allows students to work through a problem using information provided verbally or in writing allows them to develop skills from their new found knowledge. A short story with a series of questions to answer modeling your lesson reinforces your teaching. Students work alone or in cooperative learning groups and report back to the the class their results. The exercise can be harder by asking students to work through a problem without the prompt questions. For example they are given a scenario. They are expected to explain which widget is the best for the situation and why. They also are expected to explain how they would use the widget. The back report reinforces the lessons with the whole class one more time.teamwork-pxhere.jpg

The easiest check on learning is questioning. Ask the students a group of questions. They parrot back the correct answers if they memorized the material. Ask questions that require students to explain concepts like, “Who can tell me when a widget is the best choice?” or “What is the best way to use a widget in the following situation…?” require students to think about their responses and apply what they learned in their response. These questions demonstrate understanding versus simply knowledge.

A spin off of the questioning check on learning model requires each student to write a question about the lesson on one side of an index card and the answer on the back. Use the cards as questions in a quiz show like review at the end of class. Student contestants will be able to challenge the ‘correct’ answer provided on the card. Award bonus points for the team if they successfully challenge the ‘correct’ answer. This process allows the class to correct misunderstood information and research correct answers further embedding new found knowledge and skills.

Relay-pxhere.jpgStudents and trainers come together for the purpose of transferring knowledge and skills to students. Each has a responsibility to enable learning. The trainer’s responsibility is to ensure the knowledge and skills are received, understood, and usable when students leave the training. Checks on learning completed throughout the lesson provide necessary feedback on the success of the transfer. Conducting a review at the end of class by repeating what you previously said is easy. Completing an in-depth check on learning as a review is harder, but shows what has been learned. Students and instructors can leave the training environment confident the new knowledge and skills have been passed and are ready to be used upon returning to their daily assignments.


Photo Credits

All photos from pxhere.com a website offering Creative Commons Zero License images.  No photographer information was available for any of the images.

Showtime!

You spent hours preparing your outline. You used an equal amount of time making sure every slide was perfect; lots of pictures, few words. You know exactly what message you want to deliver. The only thing left is to make the presentation. hand-wood-alone-close-up-speech-shape-418328-pxhere.com.jpgWhether it is a sales pitch to a valuable customer, a strategy about a change in business practice for your boss, or a training for a group of employees, you know you are about to shine. The lights come up and it is show time. At the end of your presentation, you realize things could have gone better. You ask yourself, “What went wrong?” The answer is you failed to rehearse. Rehearsals are an overlooked preparation, separating professionals from amateurs. No actor would ever step foot on stage without rehearsing; neither should you.

Rehearsing is important before any presentation. hand-screen-man-working-coffee-technology-722541-pxhere.com.jpgRehearsals are like proofreading a document. Few professionals would send out their first draft of a letter. The best have others look over the content, for spelling and grammar. A presentation rehearsal accomplishes the same thing. It allows you to find errors before your audience sees the product. Steve Jobs was notorious for rehearsing dozens of hours before any presentation. TED speakers rehearse hundreds of times before appearing on the red spot.

Here are three rehearsal tips:  rehearse with a clock, practice using your media, and perform in front of a camera. Each has pros and cons. You should rehearse using more than one method.

sand-silhouette-light-white-glass-clock-910835-pxhere.com.jpgTime yourself. Practice with the time counting up and counting down. There are plenty of mobile applications available to help you meet your time hacks. You should know where you need to be in your presentation at particular points in time. Move quickly through your introduction. Quick introductions all time to present main points. Leave at the end to fit a quality conclusion. There is an old adage, “Tell them what your are going to say; say it; tell them what you said.” A rule of thumb for an introduction and conclusion is about 10% of your time for each. That leaves at least 80% of your time for the supporting points of your thesis. End a little short of your allowed time is better than running a few seconds long. The best way to nail your time is rehearsing.

Practice using your media. If you have slides, practice with just the slides. Slides reinforce the points you make verbally. They are not teleprompters. If you have video and audio, make sure they work. Always bring speakers suitable for the room. Practice writing your points on chart paper or boards. Neatness is important.

music-night-celebration-show-space-theatre-905766-pxhere.com.jpgRecord your rehearsal; watch your recording. Reviewing your recorded presentation allows you to edit. By the time you are on stage it is too late. Recording your presentation allows you to hear the pace and volume of your speech. You observe mannerisms, good and bad. You hear words that work well, and not so much. The recording allows you time to fix the bad and improve the good.

Your presentation is all about the story. Rehearsing ensures your story is heard, understood, and acted upon by others. Practicing reveals flaws in your presentation permitting corrections. Practice reinforces your strong points. Failing to rehearse before a presentation is like sending out a first draft of a written product. Your audience sees all the flaws. Time rehearsals. Use the media you intend to show. Record and watch yourself. Taking time to rehearse polishes your act. You present a professional image. Before your next presentation, rehearse, rehearse, rehearse.


Photo Credits

All photos from pxhere.com.  No individual attribution provided.  CC0 license.

One Thousand Words

Sitting through a presentation of slides with nothing but text is a torture bordering cruel punishment. meeting-meal-food-lunch-buffet-education-686174-pxhere.com.jpgAny popular instruction beyond the basics of how to create slide decks emphasize the importance of graphics. Presenters face challenges finding inexpensive images to really make their learning or persuasion points powerfully. Learning about and finding public domain and Creative Common licensed images liberate presenters from corny clip art and open a world of high quality pictures, clip art, and video free from fees and royalties.

The Licenses

Public domain is the least restrictive level of licensing for any work. Something that is in the public domain is a work of intellectual property with an expired copyright, or released by the author into the public domain. Works commissioned by the U. S. Government and many educational institutions release works as public domain. Anyone may use them for any non commercial purpose for free. One may encounter advertising restrictions when images contain recognizable persons.

Creative Commons licenses come in several varieties. You can find the details of each at creativecommons.org. Generally a work released under a Creative Commons license is free to use for many purposes. The originator may choose to require an acknowledgment, limit modifications, limit commercial use, or any combination. Many times you can use works simply by providing credit to the creator or photographer which is a best using any reference not of your own creation.

Where to Find the Images

My readers will find I frequently use flickr.com for most of the images that appear in my posts. I frequently turn to flickr for my slide decks.flickr.PNG 
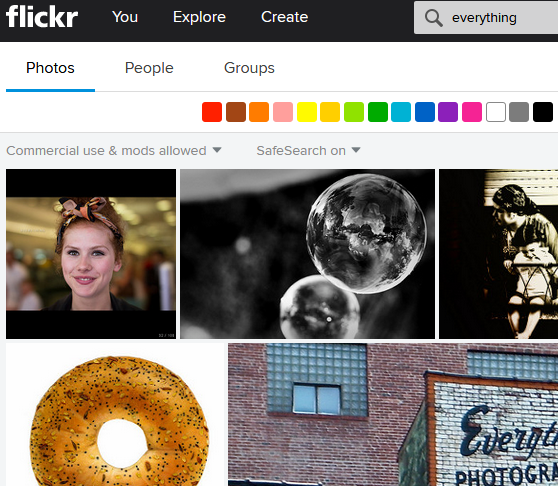
Flickr is the big name, but not the only source for free images. Google Images provides access to lots of images. Like flickr, not all are free, but like flickr, you can filter your search result to show just public domain or Creative Commons images.Google.PNG Pxhere.org images are all Creative Commons licensed with no use restrictions. That means anyone can use or remix any image for any legal purpose according to the website. pxhere.PNGClip art is more difficult to find, but a good source is openclipart.org. All images are open source. Users should familiarize themselves with the restrictions of each type of license before using images from any source.

Decks of death should be something of the past. Good presenters use images to make their points. Everyone knows a picture is worth 1000 words. Why fill your slide with boring text when an inspiring image communicates your message better? Learn to find and use free images published in the public domain or under a Creative Commons license and avoid accusations of subjecting others to cruel and unusual punishment during your next presentation.

– – – – – – – – – –

Photo Credits

After lunch meeting — https://pxhere.com/en/photo/686174

Screen shot of flickr.com search by author

Screen shot of images.google.com by author

Screen shot of pxhere.org by author


Measuring Success

Measured-Michael_Coghlan.jpg
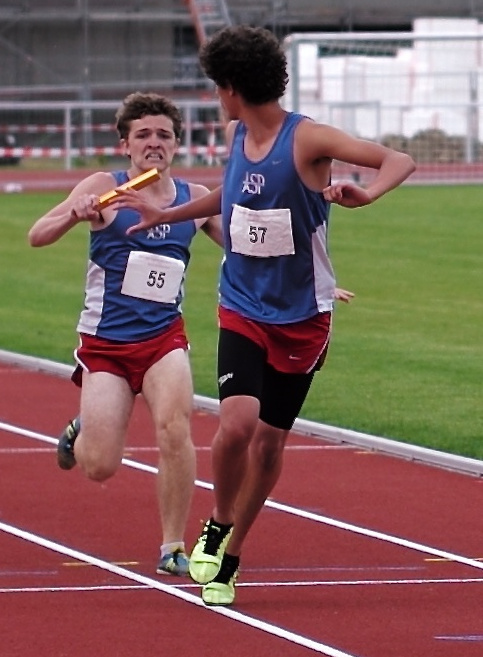
Trainers and leaders need to measure success. Measures of success demonstrate the organization does things correctly and does the correct things. Trained tasks support the organizational mission, the organization’s why. Trainers measure performance and leaders measure effectiveness. Understanding the difference ensures organizations correctly apply the correct measures to tasks by the right people.

Performance measures are those things that show we are doing something correctly. Examples include demonstrations of completing a task within a set of given guidelines, passing a test demonstrating knowledge of selected ideas, or achieving a certain result we believe leads to effectiveness. All these examples show the task is being performed correctly. These are the measures a trainer uses to demonstrate tasks are understood and performed correctly. Front line leaders use measures of performance to demonstrate assigned tasked meet defined standards.

Effectiveness measures are those things that show the organization is accomplishing its mission. Effectiveness is harder than performance to measure because organizations often have poorly defined missions. Effectiveness comes down to an individual or organization being able to focus on their one reason for existing. Examples of effectiveness measures include things like changes in behavior favorable to the organization, increased trust between employees, customer loyalty, or improvement in a given condition. Measures of effectiveness demonstrate mission accomplishment by the organization.

Organizations must understand and communicate why they exist in order to be able to measure effectiveness. Jim Collins talks about businesses that learn how to laser on their purpose for existence. Great businesses last because they were designed well in the beginning, or transform to meet changing times. There are many books that talk about the importance of why including Simon Sinek’s Start with Why, and Stephen Covey’s First Things First.  Senior leaders use measures of performance to determine success when the organization meets its mission.

As leaders and trainers measure success, they need to learn how to measure both performance of individual and collective tasks, but also the effectiveness of those tasks. Everyone may be doing everything well, but if they are doing the wrong things, they fail. Knowing which measures to use and when help organizations ultimately complete their mission. Find your why; determine what an how to achieve it, then measure your success.

– – – – – –

Photo Credit

Measured by Michael Coghlan from flickr.com under a Creative Commons License